Flame Sensor Simulation in Proteus 7
[otw_is sidebar=otw-sidebar-1] In this post I will discuss the simulation of the Flame sensor in the Proteus. In the previous post I have discussed the simulation of the Flex sensor in the Proteus. So this post is oriented around the procedure of the simulation of the Flame sensor and the PIR sensor in the Proteus.
After reading this post you will learn about the simulation model, importance of the simulation model in the library of Proteus, simulation of the flame sensor and the PIR sensor in the Proteus. So sit back, keep reading and enjoy learning.
[otw_is sidebar=otw-sidebar-3]
Flame Sensor:
The flame sensor also known as the flame detector is a type of sensor that senses the presence of the fire in its vicinity. The flame sensor can be designed in a variety of ways depending upon the method that it uses in order to detect the fire. The most commonly used flame sensors are based on the IR sensor which detects the IR waves present in the fire. The flame sensor also consists of the operational amplifier which processes the voltage received from the IR sensor. So the Flame sensor detects the flame using the IR sensor and operational amplifier integrated on the same board. The flame sensor is shown in the following figure:
Flame Sensor Library in the Proteus:
[otw_is sidebar=otw-sidebar-3]
The circuit or the embedded system should be simulated prior to its hardware development so that ant glitches in the code or error in the circuit can be detected and avoided without any loss of time or money. If you are designing the system for flame detection you should simulate the behavior of the system. In order to simulate the behavior of the flame sensor the simulation model of the flame sensor should be present in the library of the Proteus. If you want to know about the Simulation models and importance of simulation model go through my post on Ultrasonic sensor. So the simulation model of the Flame sensor is not present in the library of the Proteus by default. Note here that if the simulation model of the component is not available in the library of the Proteus then there will be no simulation for the component. We need to download the simulation model of the flame sensor and add it into the library of the Proteus. If you want to know about how to add the model in the library of the Proteus go through my post on the Ultrasonic sensor there I have discussed the procedure for placing the files containing the simulation model in the library of the Proteus.
[/vc_column_text][/vc_column][/vc_row][vc_row][vc_column][vc_btn title=”download this file” style=”classic” color=”green” link=”url:http%3A%2F%2Fprojectiot123.com%2F2019%2F03%2F10%2Fultrasonic-sensor-library-in-proteus%2F|title:flex%20sensor%20library%20for%20proteus|target:%20_blank|”][/vc_column][/vc_row]
So after downloading and placing the files of the simulation models in the Proteus library draw the circuit as shown in the following figure:
Flame Sensor Simulation in the Proteus:
[otw_is sidebar=otw-sidebar-3]
Note in the above figure that the Flame sensor has three pins. Two of the three pins are the power pins and the third pin is the output pin. The fourth pin is not present in the actual flame sensor it is present here to mock the presence of fire and stimulate the flame sensor. Now let us simulate the flam sensor behavior using the Arduino microcontroller.
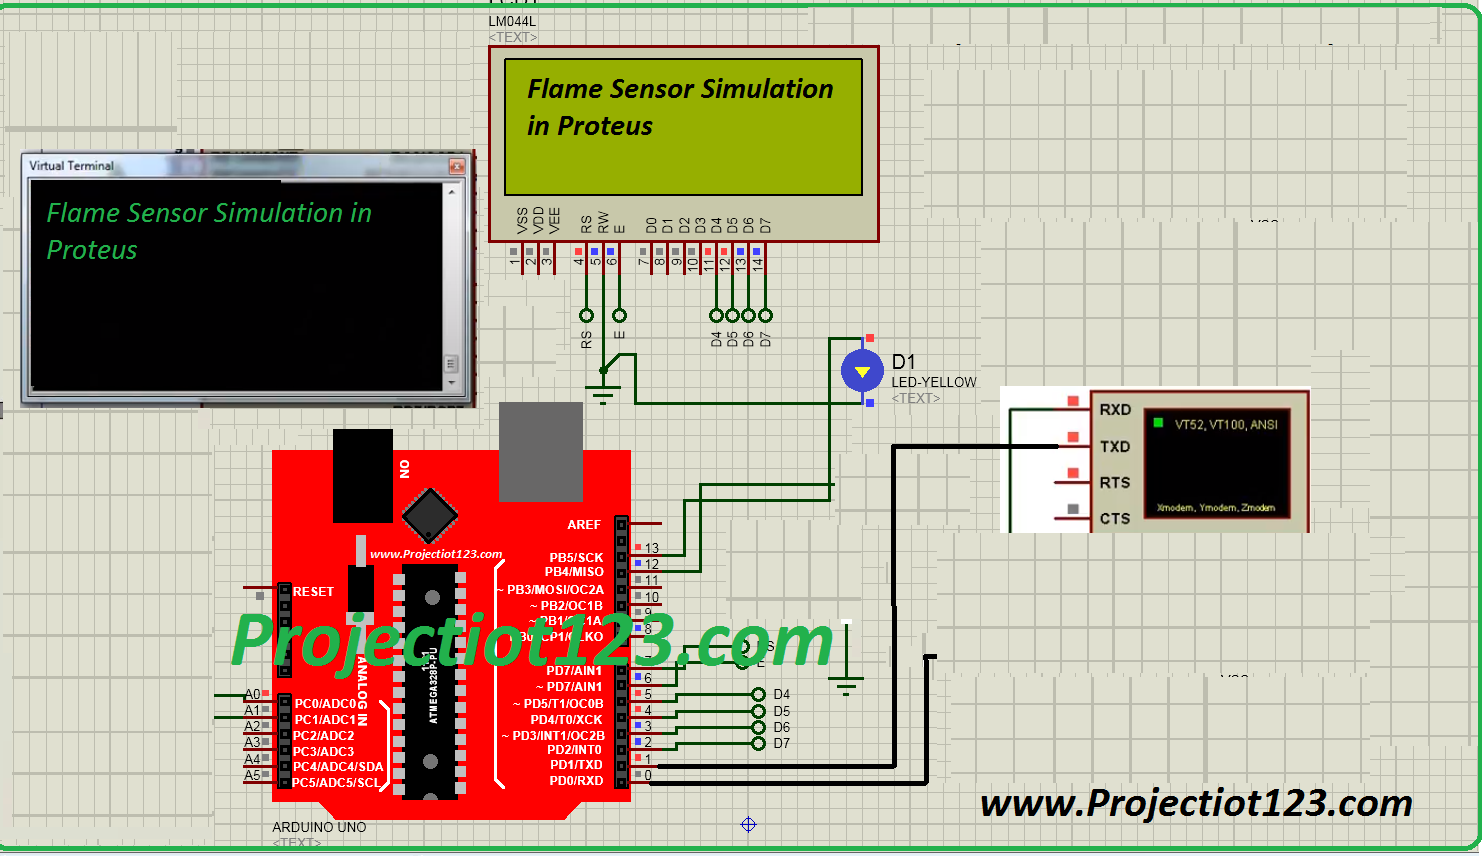
First of all draw the circuit as shown in the following figure:
After you have made the circuit in Proteus it is now time to upload the Arduino code HE X file in the Arduino simulation model as shown in the above figure. If you want to know how to add the HEX file in the Arduino go through my post on the Ultrasonic sensor. The code is shown in the following:
void setup()
{
 int Flame_pin = 13;
 int Flame_state;
 int Indicator_pin = 12;
 pinMode(Flame_pin,INPUT);
 pinMode(Indicator_pin,OUTPUT);
  }

 void loop()
 {
int Flame_state = digitalRead(Flame_pin);
  if (Flame_state == 1){
    digitalWrite (Indicator_pin , HIGH);
    }
    else{
      digitalWrite (Indicator_pin , LOW);}
      }
[otw_is sidebar=otw-sidebar-3]
If you want to know about how to create the HEX file in the Arduino go through my post on the Ultrasonic Sensor.


I would like to thnkx for the efforts you have put in writing this blog. I am hoping the same high-grade blog post from you in the upcoming as well. In fact your creative writing abilities has inspired me to get my own blog now. Really the blogging is spreading its wings quickly. Your write up is a good example of it.
I was recommended this blog by my cousin. I’m not certain whether or not this submit is written by way of him as no one else recognize such specific about my problem. You are incredible! Thank you!
You actually make it appear really easy together with your presentation but I in finding this matter to be really one thing that I believe I might never understand. It sort of feels too complicated and very extensive for me. I am having a look forward for your next submit, I¦ll attempt to get the grasp of it!
I am impressed with this site, rattling I am a big fan .
I just couldn’t depart your site prior to suggesting that I really enjoyed the standard info a person provide for your visitors? Is gonna be back often to check up on new posts
Thanks for sharing excellent informations. Your website is very cool. I’m impressed by the details that you have on this web site. It reveals how nicely you perceive this subject. Bookmarked this web page, will come back for more articles. You, my pal, ROCK! I found just the information I already searched everywhere and simply could not come across. What a perfect website.
Thanx for the effort, keep up the good work Great work, I am going to start a small Blog Engine course work using your site I hope you enjoy blogging with the popular BlogEngine.net.Thethoughts you express are really awesome. Hope you will right some more posts.