
Arduino LDR Sensor Sensor Simulation in Proteus 11
[otw_is sidebar=otw-sidebar-1]In this post I will discuss the simulation of the Light Dependent Resistor in the Proteus. In the previous post I have discussed the simulation of the Ultrasonic sensor, Flame sensor and PIR sensor simulation in the Proteus. The Light Dependent Resistor is a commonly used sensor in most of the beginners’ projects and also Gas sensor is very useful for developing the embedded systems projects. I have also written other posts discussing the Printed circuit design in Proteus. Go through my posts on Laplace transform and Fourier Transform if you want to have the intuitive approach to these topics go through them anyhow they are worth reading.
[otw_is sidebar=otw-sidebar-2]
After reading these posts you will learn about the simulation in Proteus, importance of simulation models and simulation itself. You will also learn about how to interface the Arduino in Proteus and use the LDR sensor and Gas sensor for their simulation in Proteus. So sit back, keep reading and enjoy learning.
LDR Sensor:
[otw_is sidebar=otw-sidebar-3]
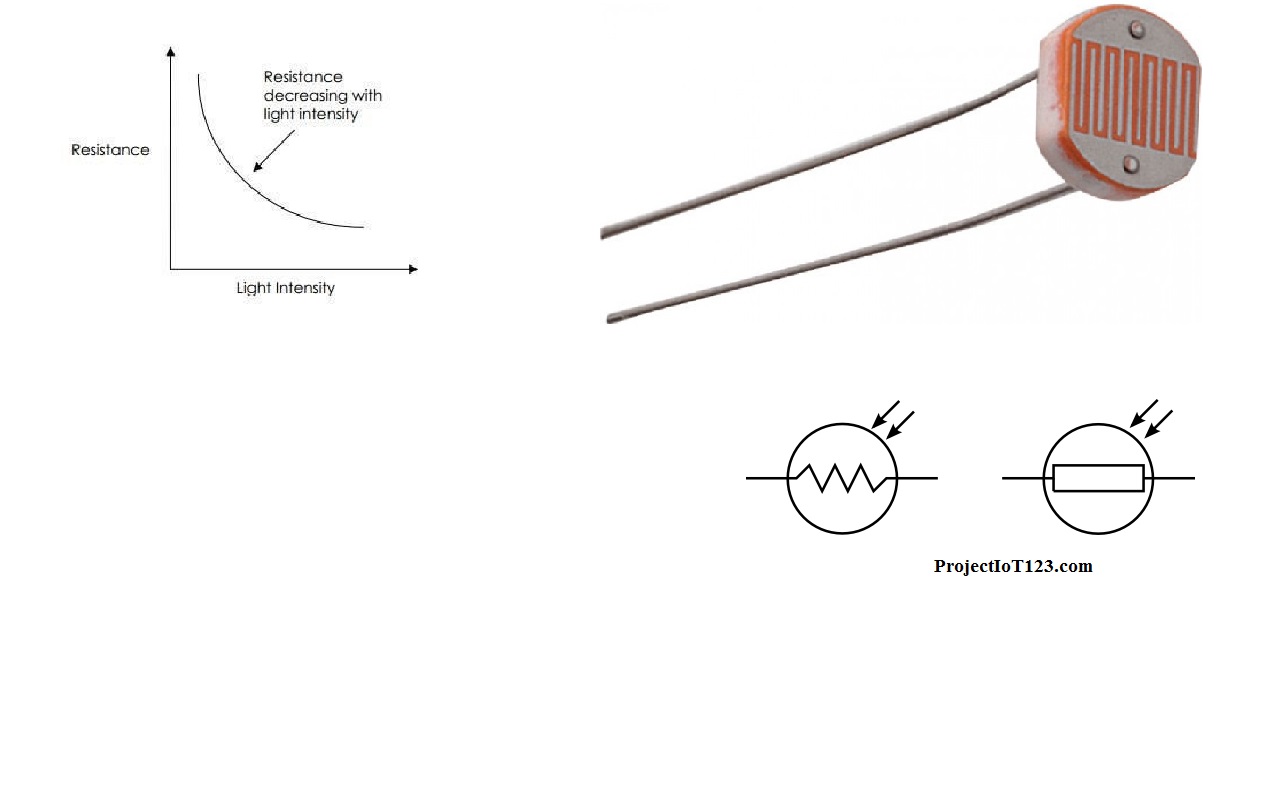
Before diving deep into the discussion on the main core of this post let us first have the brief introduction of the LDR sensor. The LDR sensor is the abbreviation of the Light Dependent Resistor and as the name implies the resistance of this sensor varies in relation to the intensity of light, greater the intensity of light lower will be resistance of the LDR sensor. The LDR sensors are based on the semiconductor technology which means that they are composed of the Silicon. As it is commonly known fact that resistance of the semiconductors varies due to change in the intensity of light so the Light dependent resistor exploit this property of the semiconductors. We will go into the detail of the Physics behind the LDR sensor in detail later here let us stick on how to use the LDR sensor simulate it in the Proteus. The schematic symbol of the Light Dependent Resistor and the light dependent resistor itself are as shown in the following figure:
What is LDR
LDR Simulation in Proteus:
Let us now see how to simulate the LDR sensor in the Proteus. In order to simulate the behavior of any circuit or any system in any of the simulation software it is important that the simulation models of all of the electronic components present in the circuit should be present in the library of the software. If the simulation model is not present then the software will be unable to simulate the whole circuit. The simulation models of most of the components are usually present in the library of the Proteus by default. If you want to learn about how to add the simulation model files of the components in the Proteus go through my post on Ultrasonic sensor. Fortunately the simulation model of the LDR sensor is already available in the Proteus by default.
Follow the following simple steps to simulate the LDR circuit using the Arduino Microcontroller Development Board.
[otw_is sidebar=otw-sidebar-2]
Step1:
Add all the components in the workspace. The list of the components that will be utilized for this simulation are as follows:
- Arduino Uno.
- LDR.
- 1 k ohm resistor.
- LED.
Note here that the simulation model files for the Arduino board are not present in the library of the Proteus by default. So in order to simulate the behavior of the Arduino you need to download the simulation model files. My post on Ultrasonic sensor discuss in detail about how to download and add the simulation models files in Proteus. I am here assuming that you have downloaded the Arduino library for Proteus and place it in the library of the Proteus. Add the components in the workspace as shown in the following figure:
[/vc_column_text][/vc_column][/vc_row][vc_row][vc_column][vc_btn title=”Download this File” style=”classic” color=”green” link=”url:http%3A%2F%2Fprojectiot123.com%2F2019%2F12%2F25%2Fdownload-proteus-library-of-components%2F|title:flex%20sensor%20library%20for%20proteus|target:%20_blank|”][/vc_column][/vc_row]
Step2:
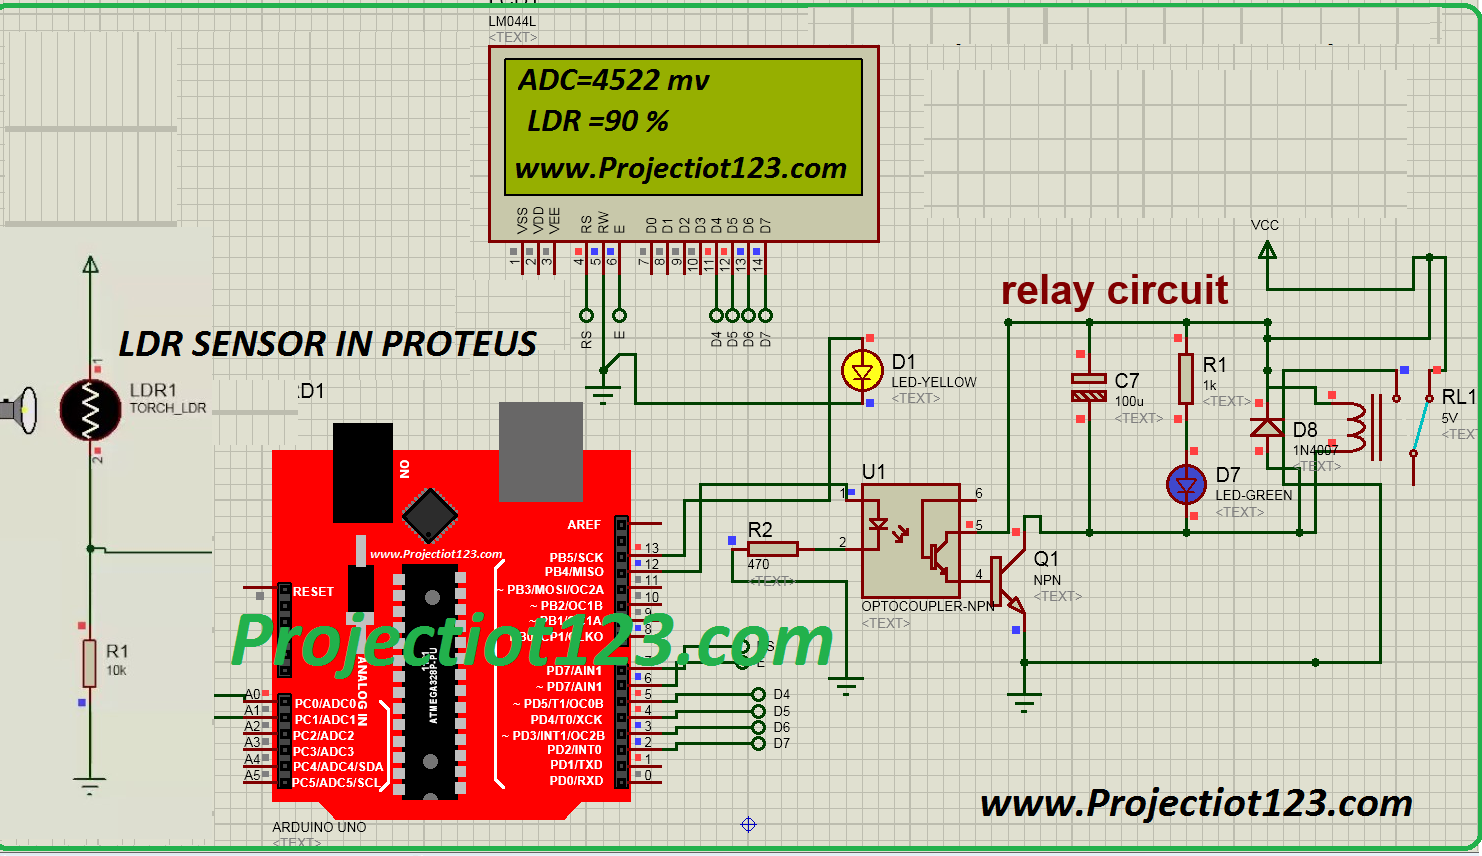
After placing all the components it is now time to draw the circuit as shown in the following figure:
Step3:
[otw_is sidebar=otw-sidebar-3]
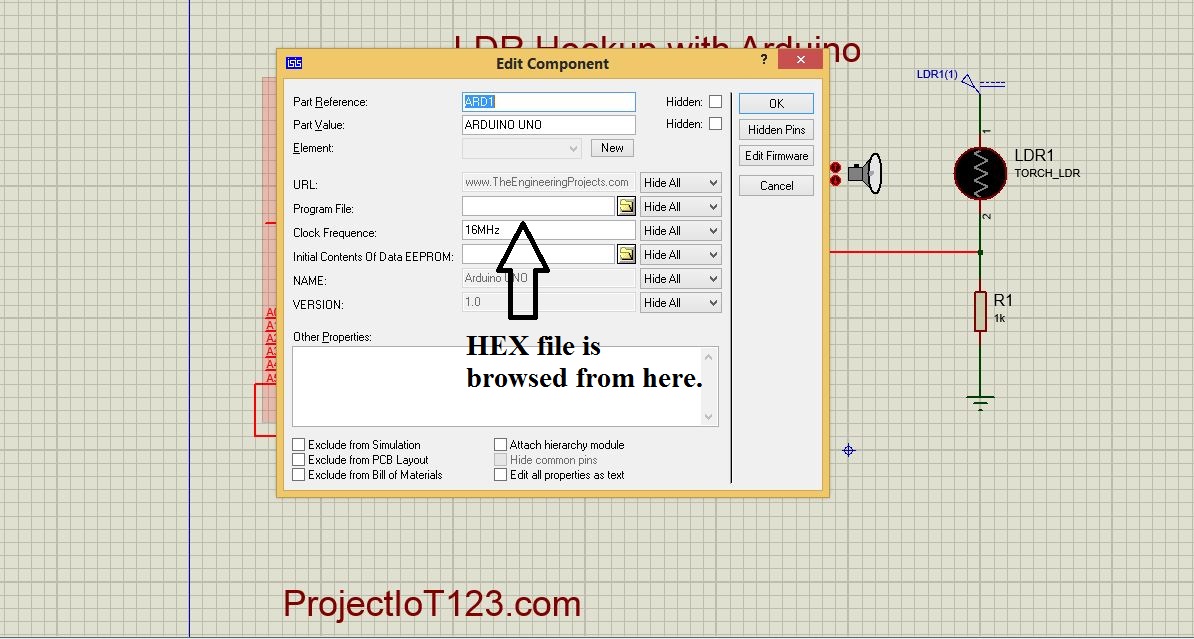
Now obtain the HEX file of your Arduino code and attach that file to the Arduino in Proteus. The method of obtaining the HEX file in the Arduino IDE and attaching it to the Arduino has already been discussed in post on Ultrasonic sensor please go through to that post to learn the method. The HEX file is attached to the Arduino as shown in the following figure:
Step4:
After attaching the HEX file the simulation is ready. Hit the simulation button and the animation.Arduino LDR Sensor Sensor Simulation in Proteus
Its wonderful as your other articles : D, appreciate it for putting up.
What Is Puravive? The Puravive weight loss aid is formulated using eight clinically proven natural ingredients.
Spot on with this write-up, I actually think this web site needs much more consideration. I’ll in all probability be again to learn much more, thanks for that info.
There is noticeably a bunch to identify about this. I believe you made some nice points in features also.
Outstanding post, you have pointed out some superb points, I too think this s a very superb website.
Good blog! I really love how it is simple on my eyes and the data are well written. I am wondering how I could be notified when a new post has been made. I have subscribed to your RSS feed which must do the trick! Have a great day!
I believe that is among the so much vital information for me. And i am happy studying your article. But want to commentary on some common issues, The site taste is ideal, the articles is really excellent : D. Excellent task, cheers
Youre so cool! I dont suppose Ive read something like this before. So nice to seek out somebody with some original ideas on this subject. realy thank you for starting this up. this web site is one thing that is needed on the web, someone with a bit of originality. helpful job for bringing one thing new to the web!
Fantastic web site. A lot of useful info here. I’m sending it to some friends ans also sharing in delicious. And certainly, thanks for your effort!
Howdy very cool blog!! Guy .. Excellent .. Amazing .. I’ll bookmark your website and take the feeds also…I am happy to find a lot of helpful info right here in the publish, we want work out extra techniques on this regard, thanks for sharing. . . . . .
I am not certain where you’re getting your information, however great topic. I needs to spend some time learning much more or figuring out more. Thank you for fantastic info I used to be on the lookout for this information for my mission.