
Allegro Pcb Design Tutorial Slide command 1
[otw_is sidebar=otw-sidebar-1]I hope you are all fine; this is the third tutorial in a series of introduction to Allegro PCB designer. In the previous tutorial I have discussed about how to alter the width and bent angle of the Cline, in this post I will discuss about another basic command “Slide”.
Note:
Cadence Allegro Tutorials
| LIST OF Cadence AllegroTurorials | Names |
| Tutorial # 1 | Introduction to Allegro PCB Designer |
| Tutorial # 2 | Allegro Use “Add Connect Tool” |
| Tutorial # 3 | Allegro Use “Slide Tool” |
| Tutorial # 4 | Allegro Use “Hilight & Dehilight Tool” |
| Tutorial # 5 | Allegro Use “Show Measure & Grid” |
| Tutorial # 6 | Introcution to Nets in Allegro |
| Tutoiral # 7 | Introcution to Stackup in Allegro |
| Tutorial # 8 | Introcution to Copper Shapes in Allegro |
| Tutorial # 9 | Introduction Vias and GND Plane in Allegro |
ALL Orcad Allegro Tutorial for Beginner Ask free to Question us
[otw_is sidebar=otw-sidebar-2]
Allegro Pcb Design Tutorial Slide command (Part 3)
After the routing is completed you need to adjust the routes so that the spacing between the adjacent routes is optimized also the shape of the routes is optimized and this is done by the “Slide” command. “Slide” command is also used to make the board routing look cleaner, the “Slide” command is as shown in the following image:
 The “Slide” command is made active by left clicking the icon and when it is activated its name appears at the left bottom of the window and the message will appear on the command window saying “Pick Element to Slide” as shown in the following image:
 When the “Slide” command is activated open the “Find” window. You will see that some of the elements that are valid for the “Slide” command are highlighted and other are de-highlighted. Among the highlighted elements make sure that the check box of the “Cline segs” is checked, recall from the previous tutorial that it is crucial otherwise the software will be unable to select the Cline segment to slide it. It is recommended to go through my previous tutorial to learn about “Find” and “Options” window.
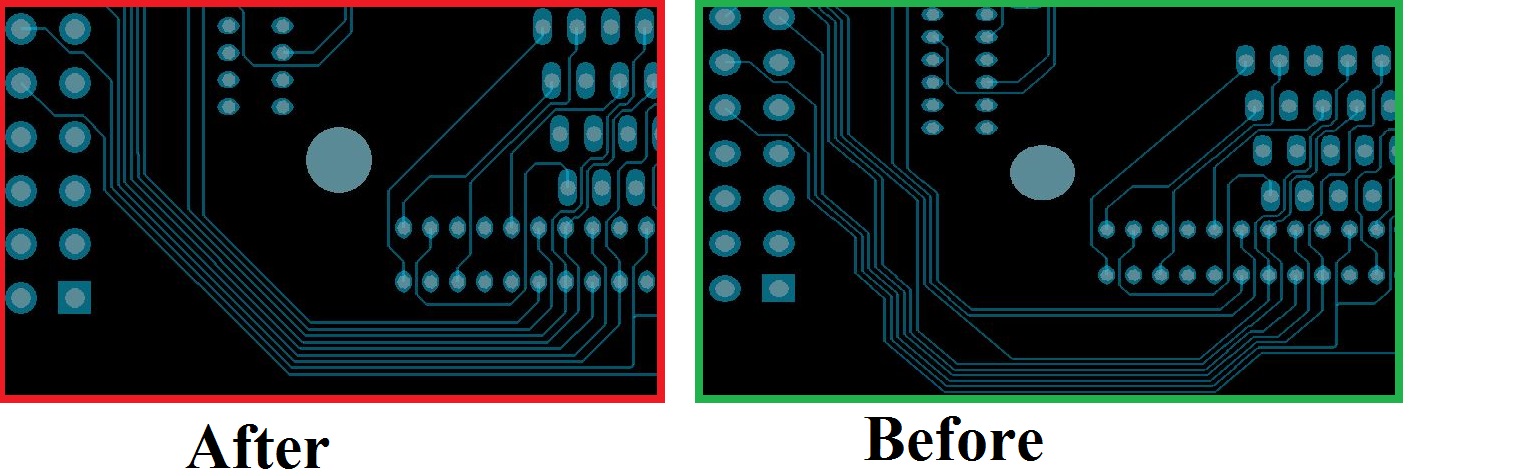
Now drag the cursor on the Cline segment, click to select it and then drag it to slide it. The Clines before and after adjusting them are as shown in the following image:
As shown in the above the application of the “Slide” command has completely altered the look of the copper etches they look more organized and also the electrical characteristics of the copper etch would also improve. As with more number bents can be dangerous for high speed signals thus application of the “Slide” command is inevitable and important to learn from beginning. Another important thing to learn is the minimum corner size. Activate the “Slide” command and open the “Options” window as shown in the following image.
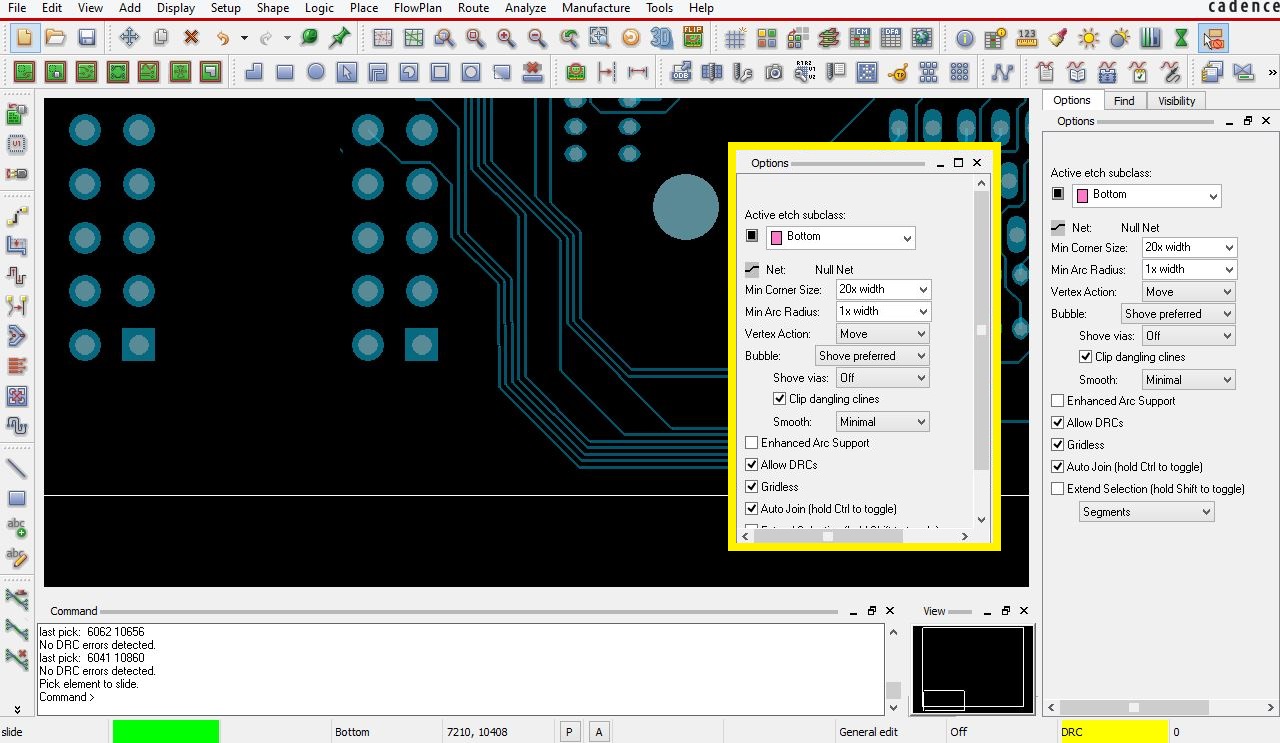
In the above image notice that the minimum corner size is selected to be 20 it means that the corners of the Clines will not decrease beyond 20. That is when you slide the Cline segments so that the corner size is reducing then the Cline will stop to slide further when the corner size of the 20 is achieved, different corner sizes can be selected by enter the minimum corner size in the “Options” window as shown in the following image.
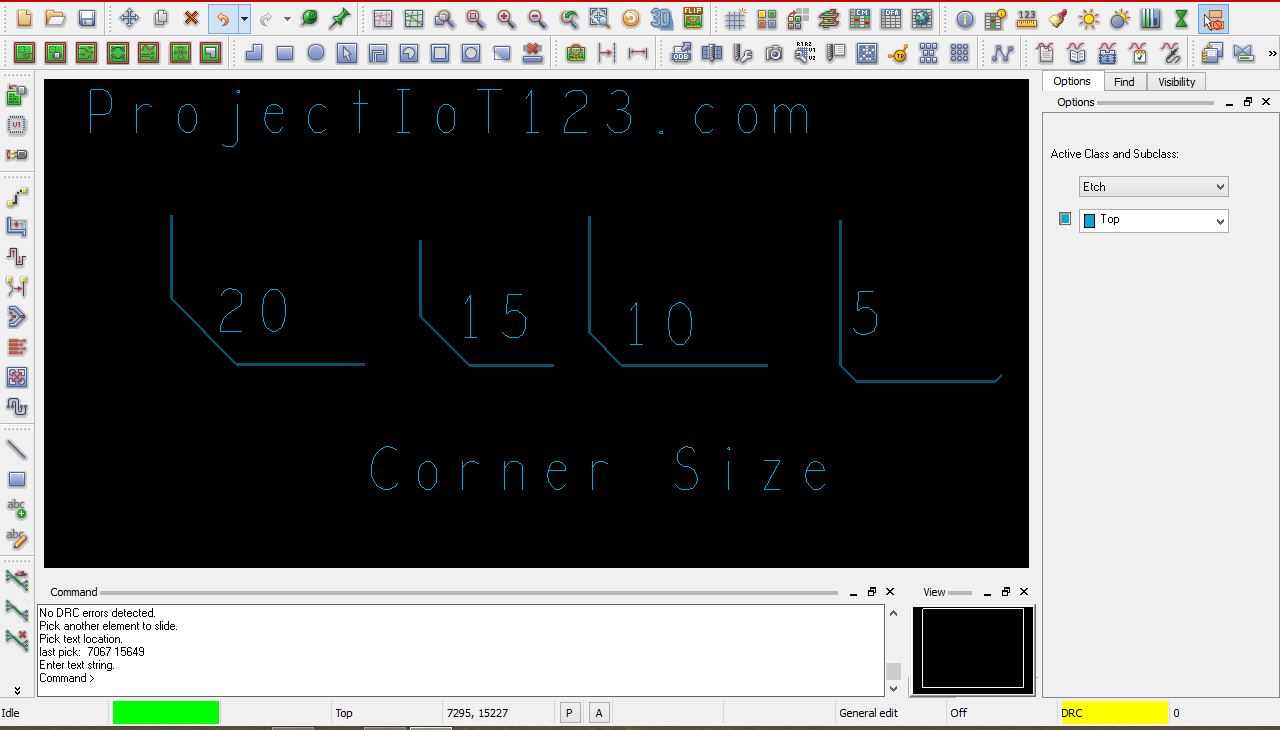 As shown in the above images the corner size stops to reduce after they have reached the prescribed minimum level.
Introduction to Allegro PCB Designer (Part 3)
[otw_is sidebar=otw-sidebar-3]
We have learned the use of basic commands “Add Connect” and “Slide” in these three tutorials in the next tutorial the use will be more complicated. That is all for now I hope this tutorial would be helpful for you, in the next tutorial I will discuss about other important commands till then stay connected, keep reading and enjoy learning.
Wow, fantastic blog format! How long have you ever been blogging for?
you make blogging look easy. The full look of your
website is great, let alone the content material! You can see similar here e-commerce