
Interfacing ESP8266 and Arduino UNO IOT base countdown Timer in proteus
Interfacing ESP8266 and Arduino UNO IOT base countdown Timer in proteus
In this article we will learn how to Interface ESP8266 and Arduino UNO IOT base countdown Timer in proteus.
In the last post we will learn how to Interface Advance weather station using ESP8266 in proteus. You can visit our website,
I hope you appreciate my work, let’s discuss about today’s project.
Components:
- ESP (8266)
- Resistor (10k)
- Capacitor (100nF)
- Push button
- LED
- Arduino UNO
- Jumper wires
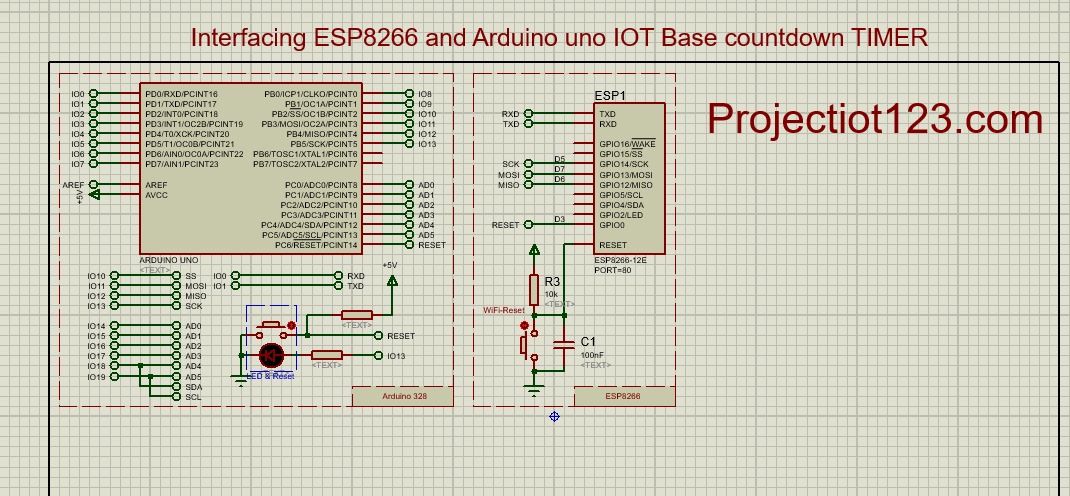
Diagram of this project is below:
Construction of ESP8266 and Arduino UNO IOT base countdown Timer
- Connect TX pin of ESP with RX pin of Arduino
- Connect RX pin of ESP with TX pin of Arduino
- Connect SCK pin of ESP with D13 pin of Arduino
- Connect MOSI pin of ESP with D11 pin of Arduino
- Connect MISO pin of ESP with D12 pin of Arduino
- Connect D3 pin of ESP with Reset pin of Arduino
- Connect Reset pin of ESP with one side of capacitor
- Connect 2nd side of capacitor with GND
- Connect one side of resistor 10k with one side of push button and then connect at the junction of capacitor and reset pin of ESP
- Connect 2nd side of resistor with +ve
- Connect 2nd side of Push button with GND
- Connect one side of another resistor 10k with +ve side of LED
- Connect –ve side of LED with GND
- Connect 2nd side of resistor with D13 pin of Arduino
Working of ESP8266 and Arduino UNO IOT base countdown Timer
To create an IoT-based countdown timer using an ESP8266 and an Arduino Uno, you’ll need to set up the hardware and write the necessary code
Applications of ESP8266 and Arduino UNO IOT base countdown Timer
- Smart Home Automation
- Cooking Timer
- Watering System
- Event Management
- Security System
Advantages of ESP8266 and Arduino UNO IOT base countdown Timer
- Low Cost
- Wi-Fi Connectivity
- Easy Programming
- Customizable