
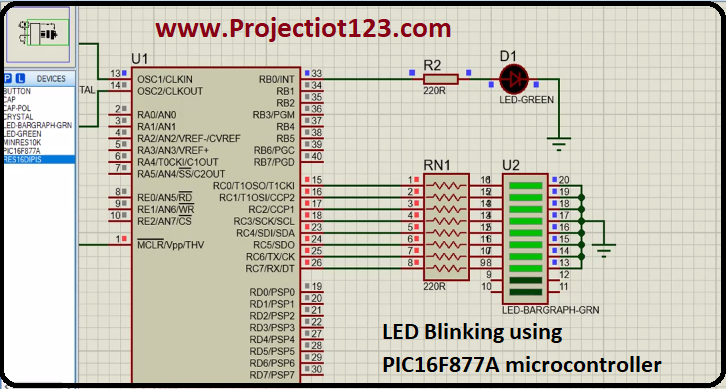
LED Blinking using PIC16F877A microcontroller
LED Blinking using PIC16F877A microcontroller
In this article, we will learn how to make LED Blinking using PIC16F877A microcontroller.
In the last post, we learned how to make GAS-level monitoring system with ESP32.
Components Required:
- Microcontroller (PIC16F877A)
- LED
- Resistor (220)
- Breadboard/PCB
- Power Source
- Wires and Connectors
How it works:
LED blinking using a PIC16F877A microcontroller works by controlling the flow of electrical current through an LED (Light Emitting Diode) connected to one of the microcontroller’s pins. The microcontroller is programmed to turn the LED on and off at specific time intervals, creating the blinking effect.
LED Blinking using PIC16F877A:
Usages:
LED blinking using a PIC16F877A microcontroller has various practical applications across different fields:
Here are some:
- Indication and Signaling
- Testing and Debugging
- Visual Feedback
- Low Power Signaling
- Educational tool