Enabling the I2C Port in Raspberry PI 24
[otw_is sidebar=otw-sidebar-2] In this article I will discuss about how to enable the I2C (inter-integrated circuit) port in the Raspberry Pi. The Raspberry Pi has I2C (inter-integrated circuit) disabled by default, so it needs to be enabled before connecting Raspberry Pi to the I2C devices. So in this post I will discuss the enabling of the I2C in the Raspberry Pi, so sit back, keep reading and enjoy learning.
[otw_is sidebar=otw-sidebar-2]
What is I2C (Inter-Integrated Circuit) Bus:
An I2C (Inter-Integrated Circuit) is a serial communication bus consisting of two open-drain lines. These two lines which comprise the I2C bus are called data line (SDA) and clock line (SCL). The I2C bus gives the ability to the Processor or Microcontroller to be connected to the number of sensors and I2C devices at the same time using just two wires. I2C communication is very effective in master-slave communication with master having the ability to control the number of the slave devices. Each slave device is assigned with the particular address with the help of which the master device can talk to the particular slave device. A number of renowned IC manufacturers manufacture the ICs with the feature of the I2C (inter-integrated circuit) port.
Enabling the I2C Port in Raspberry PI:
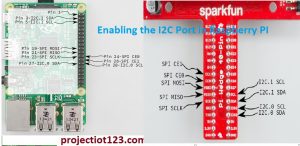
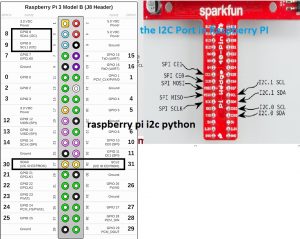
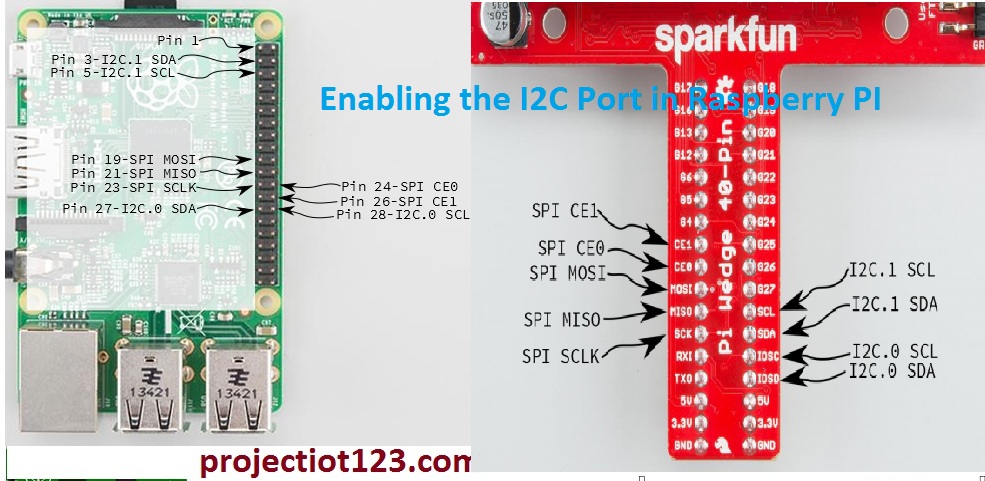
Raspberry Pi has advantage of the I2C port in it. But the I2C port (inter –integrated circuit) is disabled by default. So we need to do some changes and do some configurations before we are able to use Raspberry Pi to interact with the I2C devices. Refer to the following image to see the I2C port in the Raspberry port.
[otw_is sidebar=otw-sidebar-3]
Remember that I2C serial communication bus has two lines which are called SDA (data line) and SCL (clock line) as described earlier in the post previously. These lines use a particular protocol to communicate with the I2C devices. In this post we will stick only to enabling the I2C port in the Raspberry Pi.
Setting the I2C bus in the Raspberry Pi:
As described earlier the I2C port is disabled by default in the Raspberry Pi. So the following discussion is oriented around the steps to install and the enabling the requisites for the I2C port in Raspberry Pi. So follow the following steps to be able to enable the I2C communication in the Raspberry Pi.
Step1:
Open the Terminal Window of the Raspberry Pi. Terminal Window is where you type the commands to be executed.
Step 2:
Type the following command in the terminal window of the Raspberry Pi.
sudo raspi-config
After typing the above command press enter and the pop up will appear in the user interface consisting of various options. Select the Advanced Options in the pop up and you will be guided to the next pop up here select I2C. A dialog box will appear saying “would you like the ARM I2C to be enabled”. Select yes and the I2C communication is ready to use. But we will be needing additional features to be installed which are described in the following steps.
[otw_is sidebar=otw-sidebar-1]
Step 3:
After you have completed the above steps reboot the Raspberry Pi, Type the following command in the terminal window to reboot the Raspberry Pi.
sudo reboot
Step 4:
After the rebooting you need to update the Raspberry Pi to make sure that everything is already installed in your Raspberry pi. To do this type the following command in the terminal window:
sudo apt-get update
Step 5:
Now you need to install the I2C (inter-integrated circuit) tools in the Raspberry Pi. To do this type the following command in the terminal window:
sudo apt-get install i2c-tools
After you have typed this command the raspberry pi will automatically start installing the tool. A dialog will appear during installation. Simply type ‘y’ and enter. The I2C tool is basically the terminal program that allows you to interface and control the peripheral devices connected to the Raspberry Pi via I2C port. Through this terminal program you can collect data from the I2C connected devices and perform other tasks. In short it is very useful to have the I2C tools.
Now all the requirements for the I2C communication using the raspberry pi has been fulfilled. In other words now you can connect any I2C device to the Raspberry Pi via I2C port and can communicate serially using I2C protocol.
How to determine the address of the I2C peripheral device:
 As described earlier I2C communication can have one master and many slaves. That is a master device can send data to any of the slave. So to this do each slave device is assigned with a particular I2C bus address. So that a Master device which in our case is Raspberry pi can access any I2C device using its particular I2C bus address. But for this you need to know the I2C bus addresses of all the devices connected to the Raspberry Pi via I2C port. The I2C bus address of each I2C peripheral device can be found out by using the following command in the terminal window:
[otw_is sidebar=otw-sidebar-3]
i2c detect r-1
Type this command and then press enter. The terminal window of the Raspberry Pi will give the list of the devices connected to I2C serial communication bus along with the unique I2C bus address for each device connected to the Raspberry Pi via I2C bus.
It is important to note that the I2C bus in the Raspberry Pi is pulled up using the pull-up resistors before connecting it to the I2C peripheral devices.
That’s all for now. In this post we have learnt how to set up the I2C port in the Raspberry Pi. In the next post I will discuss the I2C communication using the I2C peripheral device. So stay connected and enjoy learning.

