
741 Noise Analysis circuit in proteus
741 Noise Analysis circuit in proteus
In this article we will learn how to interface 741 Noise Analysis circuit in proteus.
In the last post we will learn how to Interfacing UC 1845 PWM boost Regulator in proteus. You can visit our website,
I hope you appreciate my work, let’s discuss about today’s project.
Components which we use in this project are listed below:
- Battery (15V)
- IC (741)
- Resistor (1k)
- Resistor (50,000)
- Jumper wires
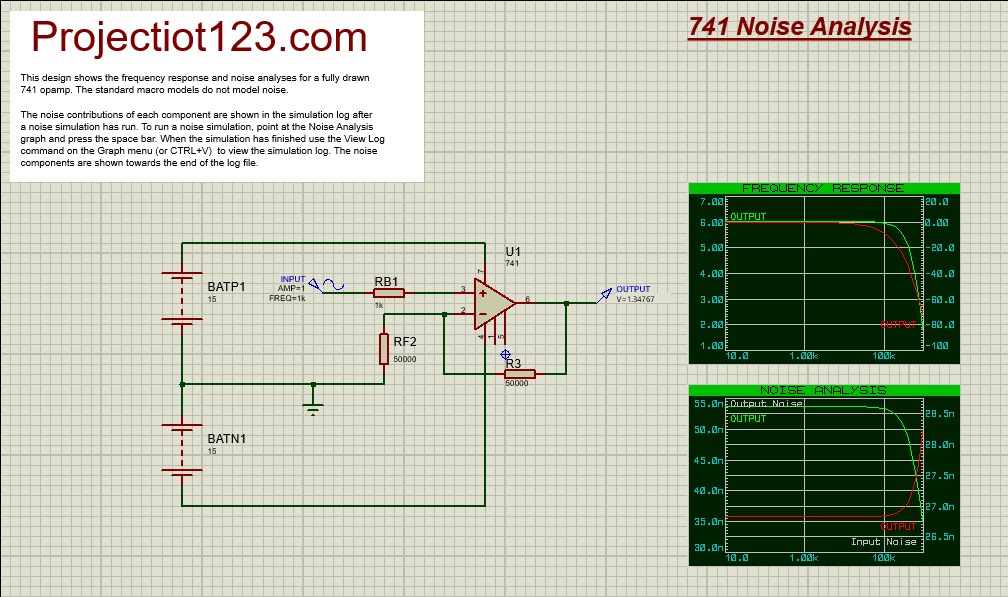
Diagram of this project is below:
Construction of 741 Noise Analysis circuit in proteus
- Connect one side of 1st battery with +ve pin of IC
- Connect 2nd side of 1st battery with one side of 2nd battery
- Connect 2nd side of 2nd battery with –ve side of IC
- Connect one side of resistor 1k with +ve pin of IC
- Connect 2nd side of resistor with input
- Connect one side of resistor with pin 2 of IC
- Connect 2nd side of resistor (50000) with junction of both batteries through GND
- Connect pin 2 of IC with one side of 2nd resistor (50000)
- Connect 2nd side of 2nd resistor with output
Working of 741 Noise Analysis circuit in proteus
The 741 operational amplifier (op-amp) is a commonly used analog integrated circuit that can be used in a wide range of applications, including signal amplification, filtering, and more. When used in a circuit, the 741 op-amp it does not generate noise; instead, it is designed to be a low-noise device. However, the noise performance of the op-amp can be affected by various factors in the circuit design.
Applications of 741 Noise Analysis circuit in proteus
- Amplifier Noise Analysis
- Filter Noise Analysis
- Oscillator Noise Analysis
- Noise Figure Measurement
- Audio Noise Analysis
Advantages of 741 Noise Analysis circuit in proteus
- Low Input Noise
- Versatility
- High Gain
- Availability
- Compatibility