
water sensor simulation in Proteus 36
 In this post I will discuss about the water sensor and its simulation in Proteus. In the previous posts I have discussed the simulation of some of the widely used sensors and actuators. This post will be oriented around the discussion on the Water sensor only.
After reading this post the reader will be able to learn about the water sensor, working of the water sensor. The reader will also learn about the interfacing of the water sensor with Arduino microcontroller development board. Finally the reader will learn about the simulation of the Water sensor in Proteus. So sit back, keep reading and enjoy learning.
[otw_is sidebar=otw-sidebar-2]
Water Sensor:
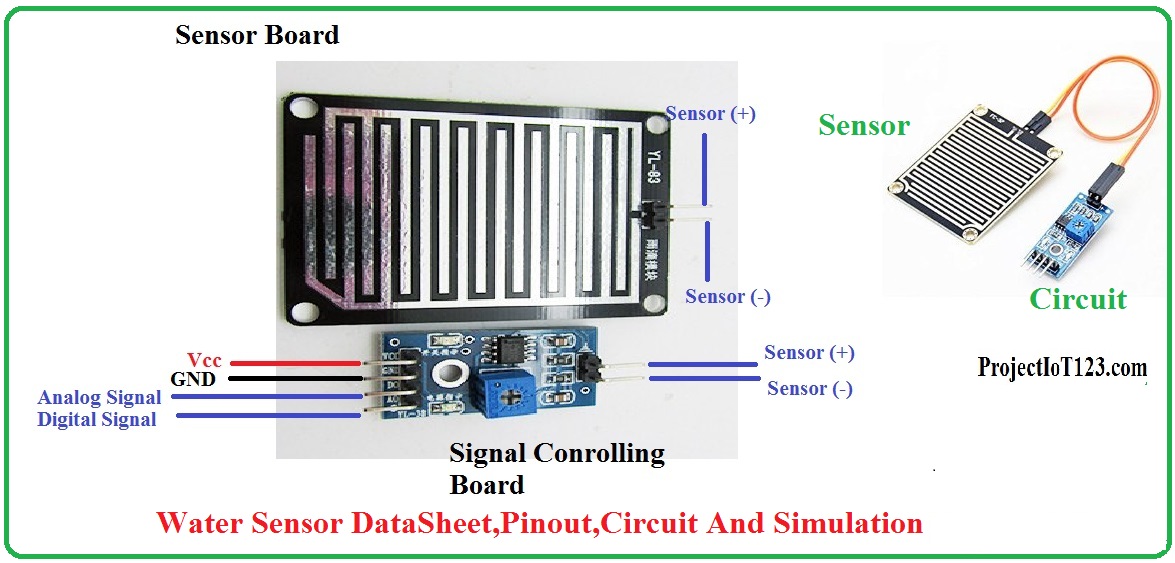
Before diving deep into the discussion on the Arduino interface with Water sensor and their simulation in Proteus let us first learn what the water sensor is and how it works. As the name implies the water sensor is the type of sensor that is used to measure the presence of the water on its surface. The water sensor measures or detects the water present on its surface by varying its resistance. That is the water sensor acts as the water dependent variable resistor more the water present on its surface lower will be its resistance and in the similar way dryer the water sensor gets higher will be its resistance thus in this way the water sensor measures the presence of water. The water sensor looks like the one in the following image:
Water Sensor DataSheet And Pinout:
As shown in the above image that the water sensor consist of the sensor and the printed circuit board. The sensor board is the actual measuring element and the circuit printed on the circuit board is used as the signal conditioning board in addition this printed circuit board also acts as the comparator which compares the reference provided by the potentiometer and that measured by the sensor board. As can be seen in the top left corner of the picture that the sensor board is connected to the printed circuit board. The board consists of four pins, the pin out of the printed circuit board is as shown in the following
[otw_is sidebar=otw-sidebar-3]
- Vcc : This terminal of the printed circuit board is connected to the 5 volt power supply.
- GND: This terminal of the printed circuit board is connected to the GND of the power supply.
- AO: This terminal gives the analog output.
- DO: This terminal gives the digital output.
It must be noted here that the printed circuit board consist of the potentiometer mounted on board. This potentiometer is used to adjust the sensitivity of the sensor. The water sensor works in such a way that if the water is present on the surface of the sensor then its digital output goes low otherwise the digital output of the printed circuit board remains HIGH an also the LED on board remains lit.
Arduino Interfacing with Water sensor:
After we learned the basics of the water sensor let us now learn how to interface the Arduino with water sensor. As we have seen in the previous section that the water sensor element is connected to the printed circuit board which in turn has four terminals. These terminals are connected to the Arduino in such way that the 5 Volt of the Arduino gets connected to the 5 volt terminal of the water sensor and the GND of the Arduino is connected to the GND terminal of the water sensor. The remaining pins are the analog output and digital output. The analog output of the printed circuit board can be connected to any of the Analog pins of the Arduino and in the similar way the digital output can be connected to the any of the digital Input / Output of the Arduino. The Arduino and water sensor hookup looks like the one in the following image:
You can use any of the digital or analog pin. Let us now see how to simulate the Arduino and water sensor in Proteus.
Arduino and Water sensor Simulation in Proteus:
[otw_is sidebar=otw-sidebar-3]
Let us now see how to simulate the Arduino and water sensor in Proteus. It is important to mention here that it is always beneficial to simulate the system before actually implementing it in real life. By simulating the circuit prior to its hardware implementation the designer can look for the glitches in the code or error in the circuit. It is important to note here that if you want to simulate the behavior of any circuit in the software it is important that the simulation models of all the components that are used in the circuit should be present in the library of the software. If the simulation model of any component is absent in the library of the software the software will be unable to simulate the behavior of the circuit. The simulation model of the water sensor is not present in the library of the Proteus by default so if we want to simulate the behavior of the water it is important for us to download its simulation model and install that in the library of the Proteus. Here I am assuming that you have already installed the simulation model of the Water sensor in Proteus.
Step1:
Add all the components in the workspace of the Proteus as shown in the following figure:
Step2:
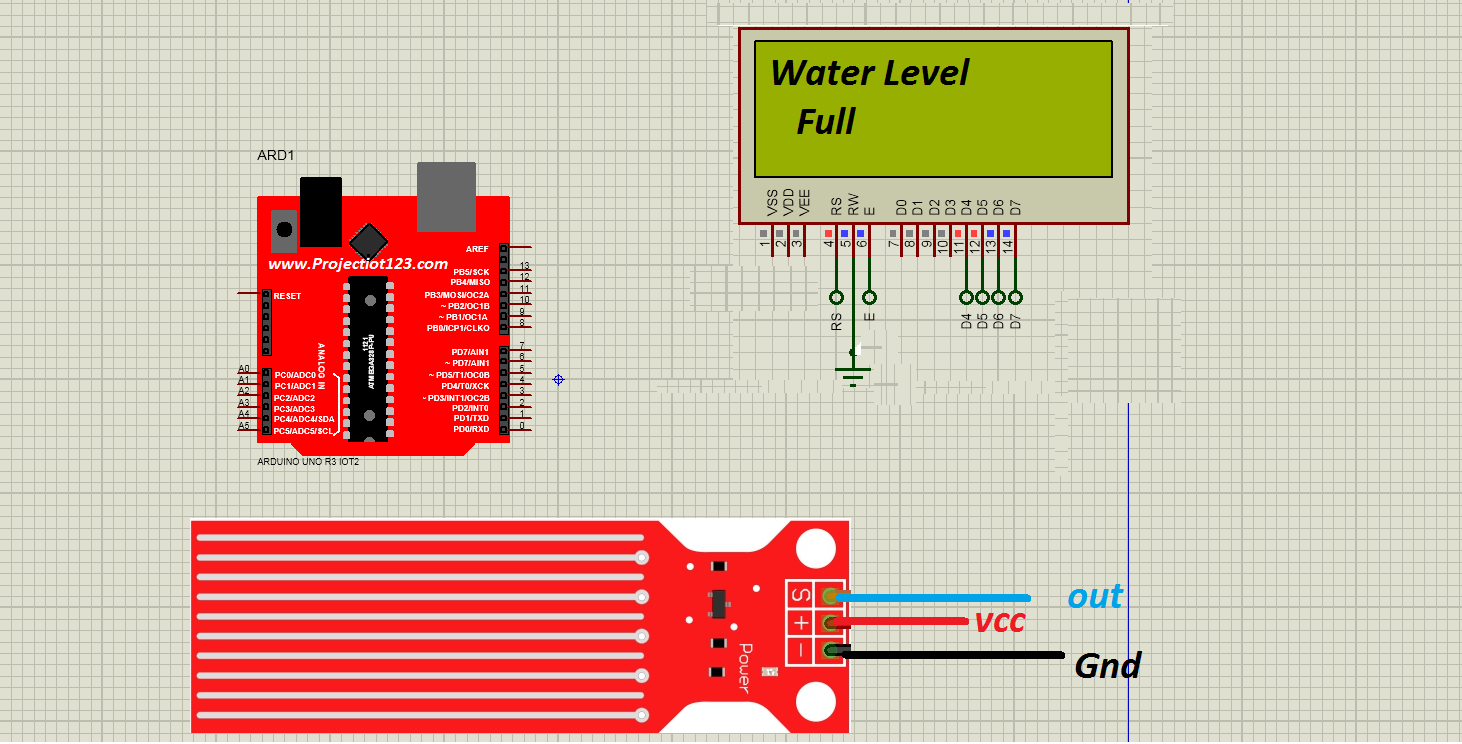
Now draw the circuit as shown in the following figure:
As can be seen in the image above that the circuit is quite straightforward. Notice here that we have used the Digital Out only.
Step3:
Now it is the time to attach the simulation file to the symbol of the water sensor as shown in the following figure:
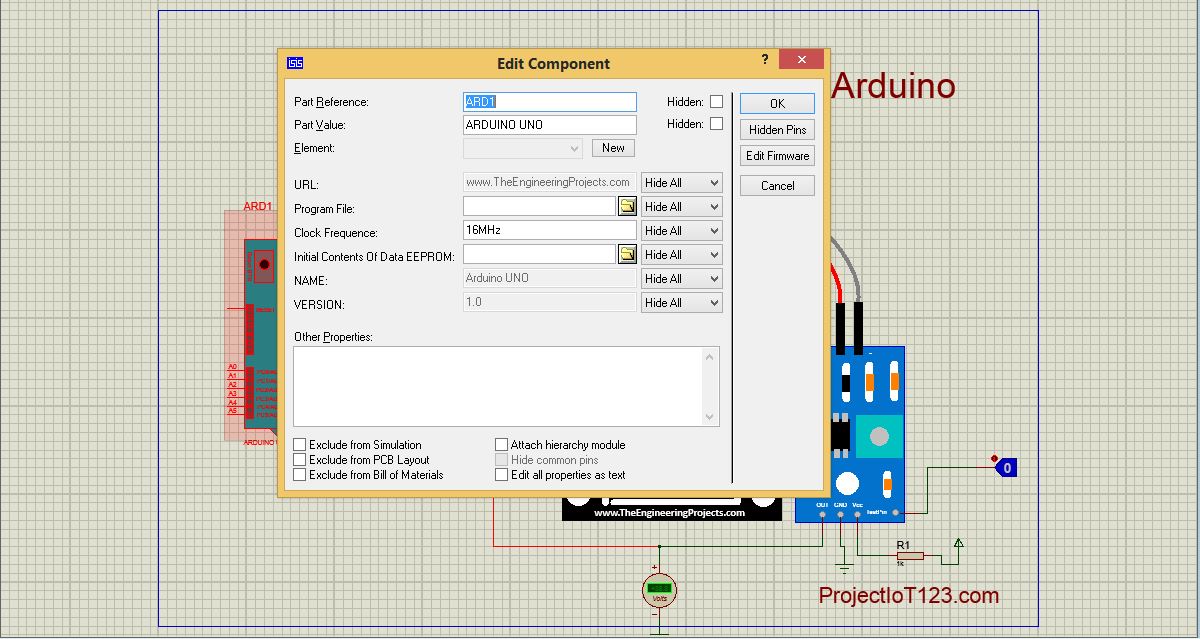
The pop up window appears by double clicking the symbol in Proteus.
[otw_is sidebar=otw-sidebar-3]
Step4:
Write the Arduino code in Arduino IDE and obtain the HEX file of the code. If you do not know how to obtain the HEX file of the code in Arduino IDE go through my post on Ultrasonic sensor I have discussed in detail there.
 The HEX file of the code is attached as shown in the above image.
That is all for now I hope this pots would be helpful for you. In the next post I will come up with more interesting applications of the Proteus and more interesting engineering topics. Till then stay connected, keep reading and enjoy learning.
water sensor simulation in Proteus In this post I will discuss about the water sensor and its simulation in Proteus.water sensor arduino in Proteus
you can download from this proteus simulation