Arduino HYT271 Humidity Temperature sensor circuit in proteus

Arduino HYT271 Humidity Temperature sensor circuit in proteus
In this article we will learn how to Interface Arduino HYT271 Humidity Temperature sensor circuit in proteus.
In the last post we will learn how to Interface Arduino HX711 spark fun Breakout Board for Load cell circuit in proteus. You can visit our website,
I hope you appreciate my work, let’s discuss about today’s project.
Components:
- Arduino Uno (328)
- IC (HYT271)
- Resistor
- Push button
- LED
- Jumper wires
Construction…
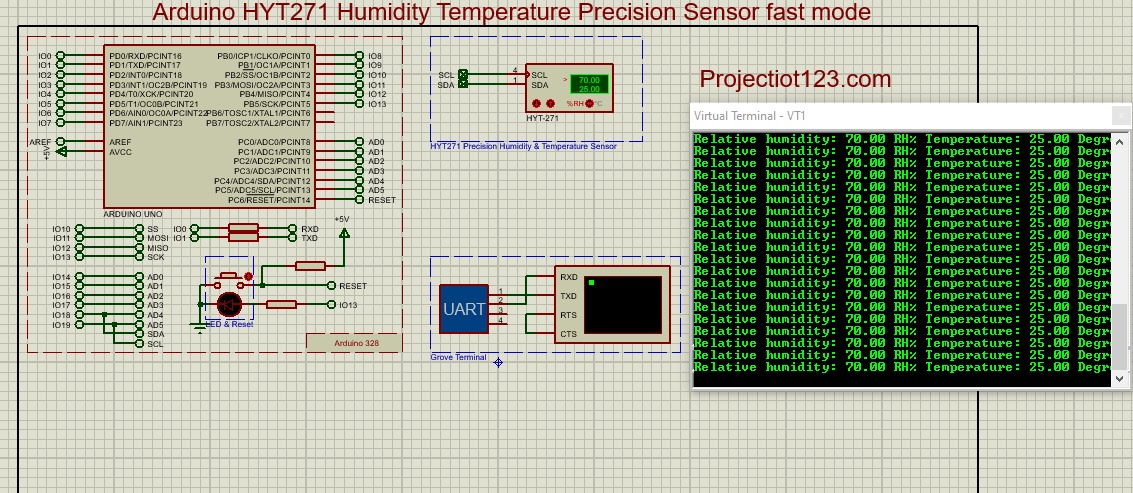
- Connect SCL pin of IC HYT271 with D19 pin of Arduino
- Connect SDA pin of IC HYT271 with D18 pin of Arduino
- Connect VCC pin of Arduino with +5V
- Connect one side of resistor with +5V
- Connect 2nd side of resistor with one side of push button and then connect them with Reset
- Connect 2nd side of push button with –ve side of LED and then connect them with GND
- Connect +ve side of LED with one side of resistor
- Connect 2nd side of resistor with D13 pin of Arduino

Working…
HYT 271 module supports two commands to read the humidity and temperature. The 8051 microcontroller writes the MR command using the following I2C write sequence. Now, after sending the MR request the sensor will wake up and calculates the humidity, temperature.
Applications…
- Industrial Automation
- HVAC
- Medical and Healthcare
- Consumer Electronics
- Energy Efficiency
Advantages…
- High Accuracy
- Temperature Compensation
- Low Power Consumption
- Compact Size
- Wide Operating Range

